
Trip to Singapore, Malaysia and the Railway
In November and December of 2022 a mate and I made a trip to Singapore, Malaysia and Thailand in order to follow in the footsteps of ‘Roaring Reggie’ Newton. The highlight of the trip was the section done at the end which was seeing the parts of the Burma-Thailand Railway where Reg and his ‘U’ Battalion men worked. As our chief guide described it, this was something of a pilgrimage but I am getting ahead of myself. What follows are some photos of that trip with comments on how these locations link in with Reg Newton’s story. There are six sections:
Singapore
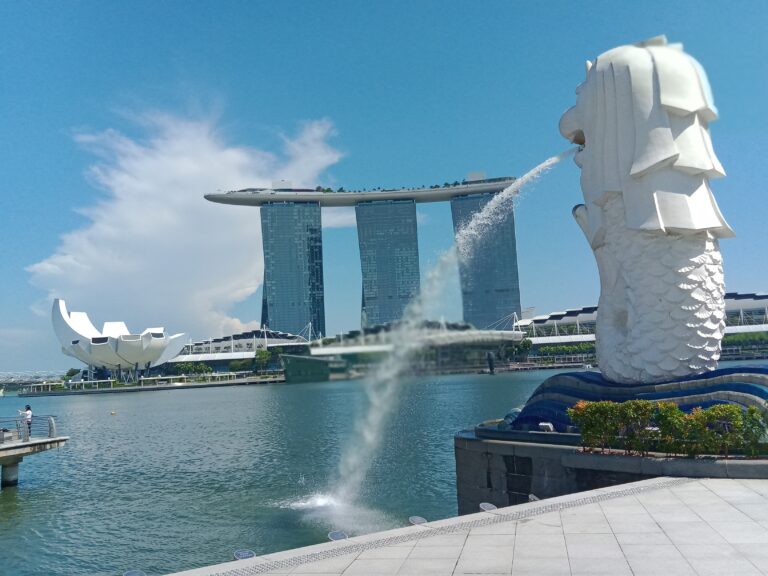
This is an iconic view of the vibrant city of Singapore today.
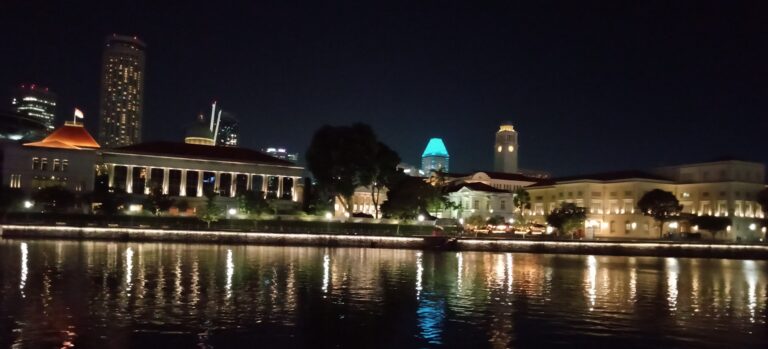
These days it is busy but beautiful by day or night.
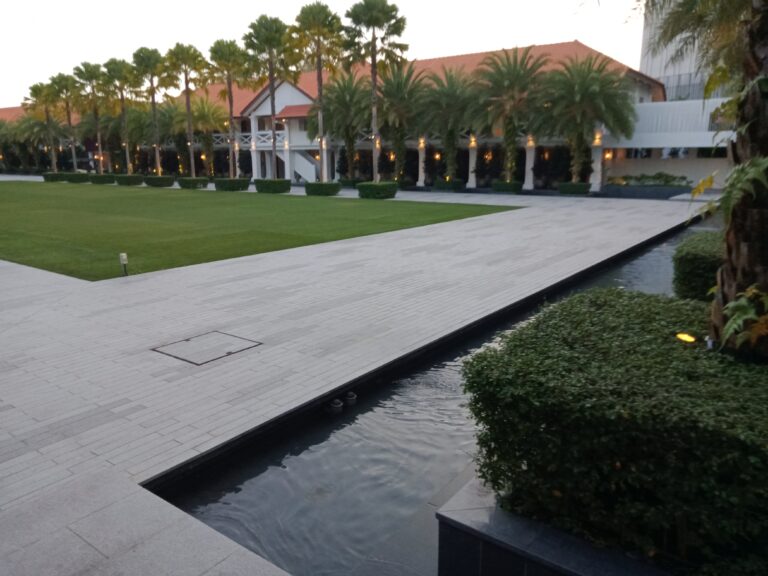
The modern-day luxury of these refurbished former barracks on Sentosa Island give a sense of the relative opulence of the colonial administration in its heyday.
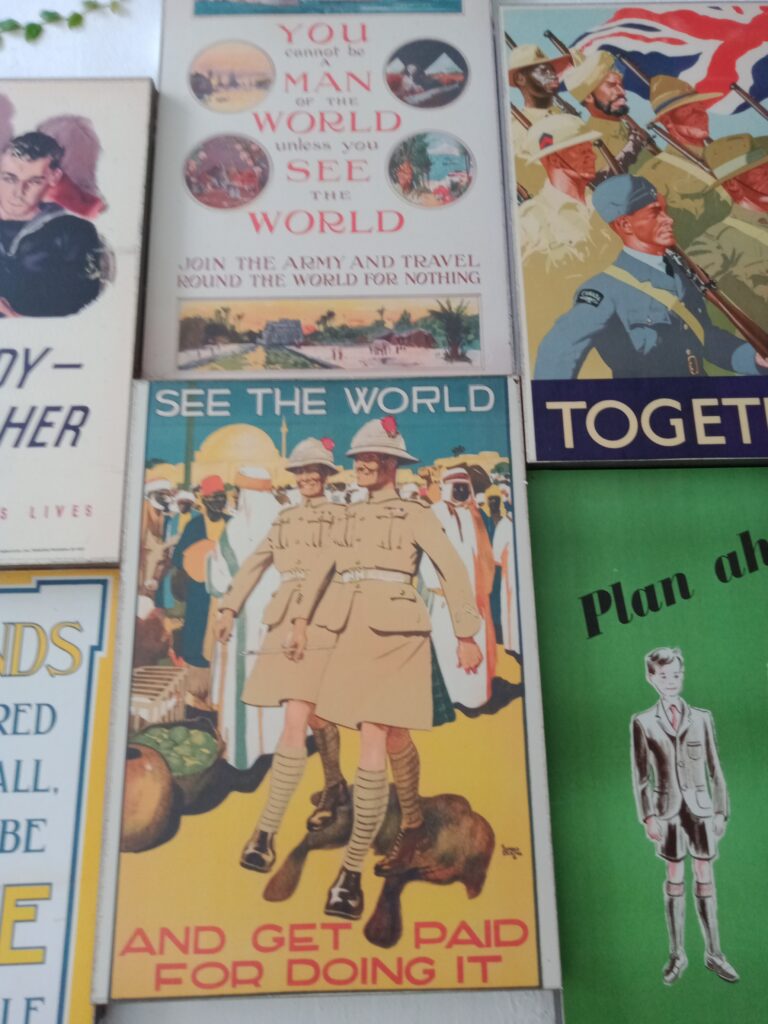
These were some pre-war recruiting posters displayed on Sentosa Island which give a great insight into the values of a bygone era—some might say evidence of pride preceding a fall.
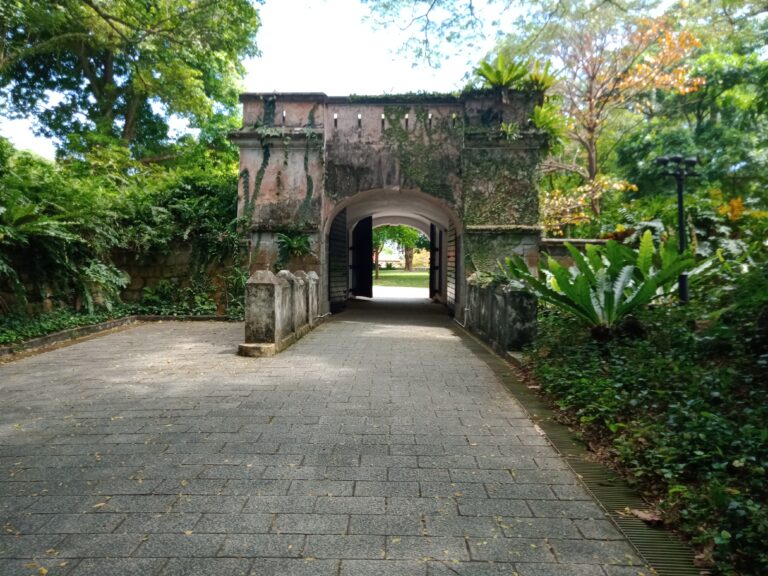
This is a remnant of the old Fort Canning which was built in the colonial era and became the headquarters of Lt-Gen. Percival’s Malaya Command. There is a tour of the underground command centre he used called ‘Battle Box’ but, unfortunately, it was closed on the day we were there (a Wednesday). A well-organised traveller would have checked that ahead of time.
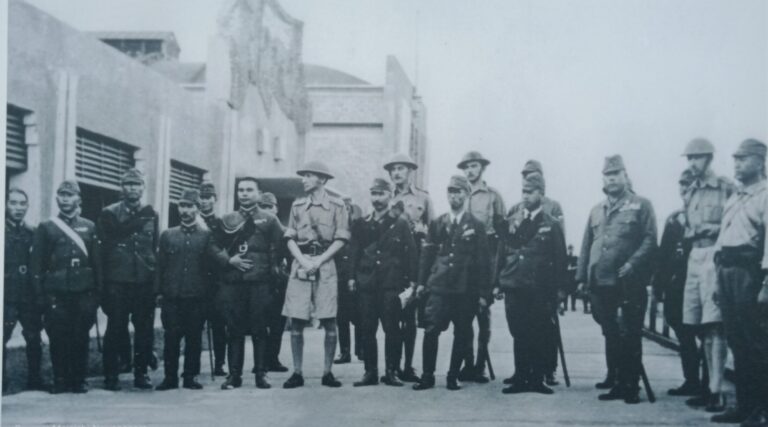
The formal surrender was signed at the Ford Factory in Bukit Timah on 15th February 1942.
Parts of the old factory remain with a good historical display covering the campaign on Malaya and Singapore, the surrender and the occupation. The photo above is a reverse angle of the place at which the original surrender photo was taken.
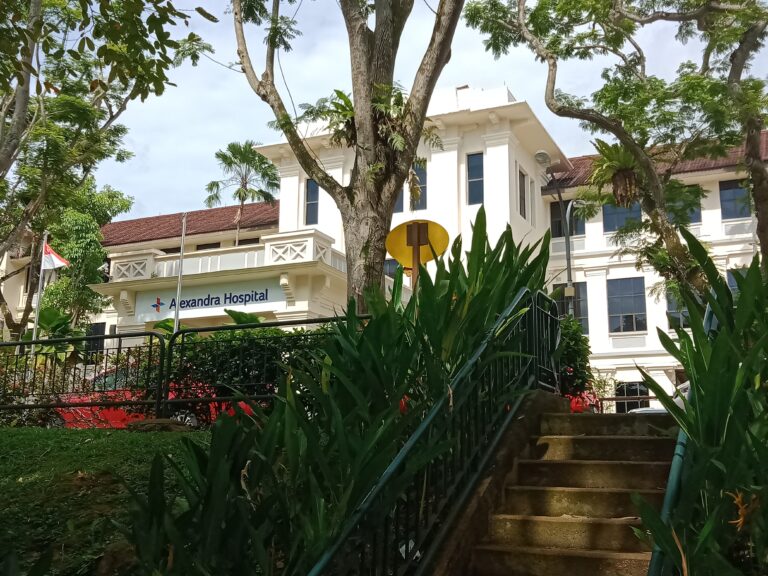
Alexandra Hospital was the site of one of the most shocking massacres perpetrated by the Japanese on British personnel up to that time. It was an insight into worse things to come for those who had the misfortune to be caught up in the calamity and chaos of the capitulation. Reg Newton spent a month in this hospital immediately after his arrival in Singapore (which was Feb 18 1941). He was suspected of having scarlet fever when what he had was pneumonia. This is where he met Capt. Bill Gaden of the 2/20th Bn whom he later took to the Railway with ‘U’ Battalion.
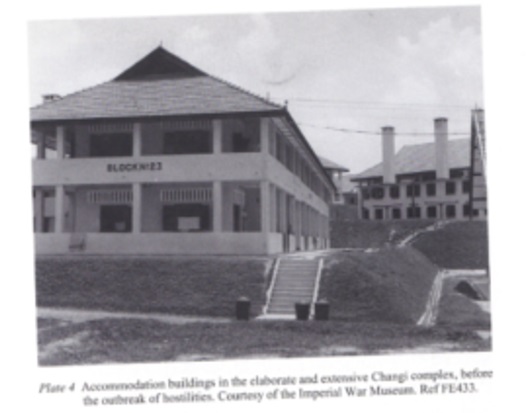
This photo taken from the photo pages (pp.118-119) of R.P.W. Havers’ book, ‘Reassessing the Japanese Prisoner of War Experience: The Changi POW Camp, Singapore, 1942-5’, shows the old barrack buildings from the Changi peninsula which were used by the Japanese to house POWs. Australian POWs at Changi were accommodated in Selarang Barracks and the British were in Roberts Barracks.
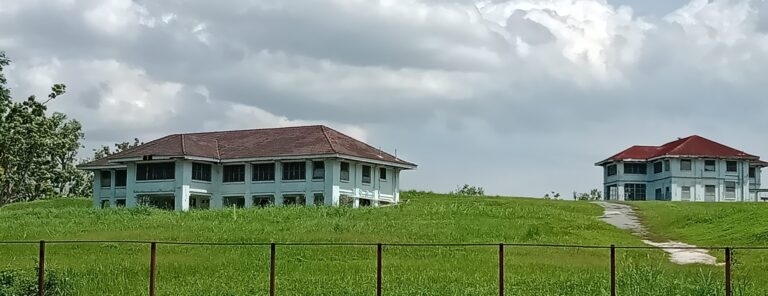
Selarang Barracks are still very much in use by the Singapore defence force today—and so, like a lot of places in Singapore, off-limits—but one can still see in the area some of the old buildings associated with accommodating and administering a colonial army.
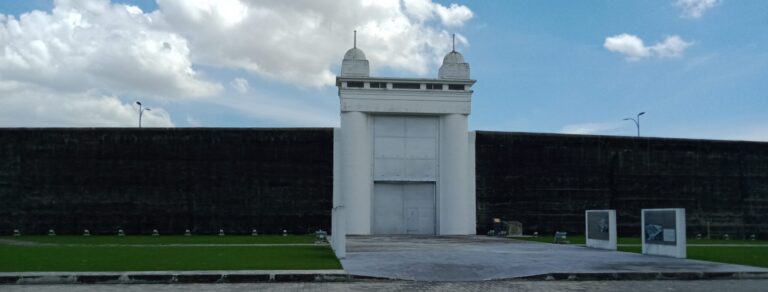
On my first visit to Singapore, I made a bee-line for Changi jail which is still very much in use today, not realising that the POWs were interned there only for the last year of the war. Prior to that civilian internees had been housed there. Mostly, prisoners were housed in and area around the old British military barracks in that part of the island.
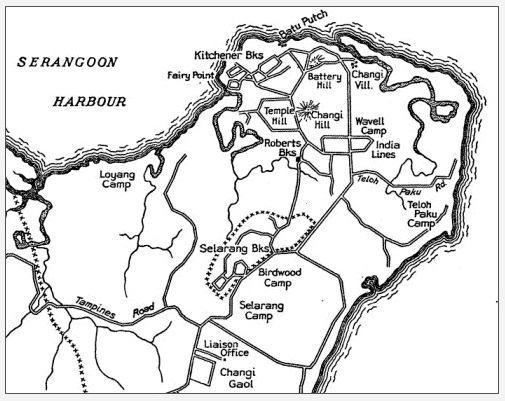
Initially I had here a very good map from the R.P.W. Havers book cited above but it simply would not reproduce well so I have taken this one from the Roy Collins Memorial site. It also is a very good illustration of the way the POWs were spread out over the entire Changi peninsula and not confined to the limited area I had previously imagined.
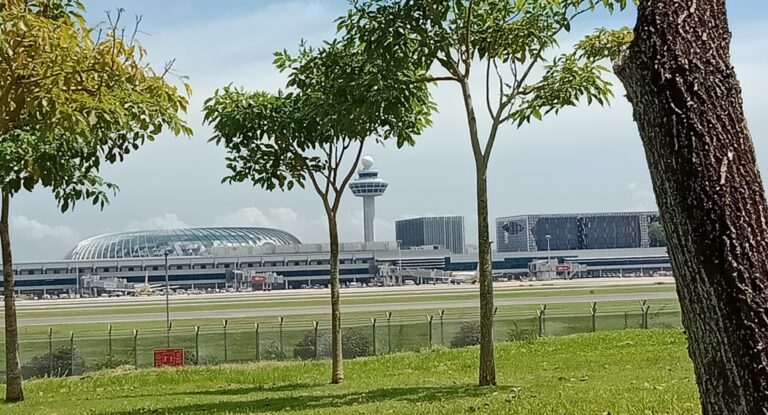
This means that on the southern aspect, one sees the present-day airport, constructed on the site of the aerodrome Changi POWs laboured to build in the last year of the war.
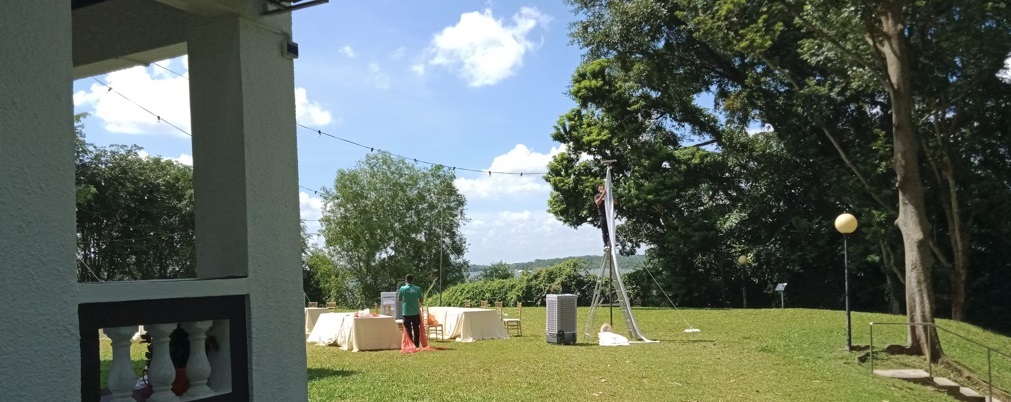
And on the northern aspect, one looks across the Strait to Johore. This photo was taken at Fairy Point which has a beautiful complex of former colonial buildings now used for clubs of various sorts and, as in the case of this one, wedding receptions.
These days it projects an ambience very different from its torrid POW past.
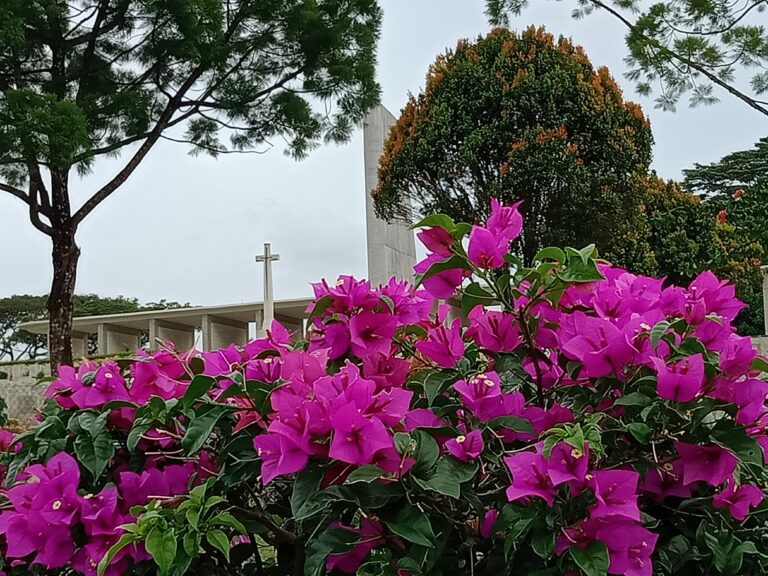
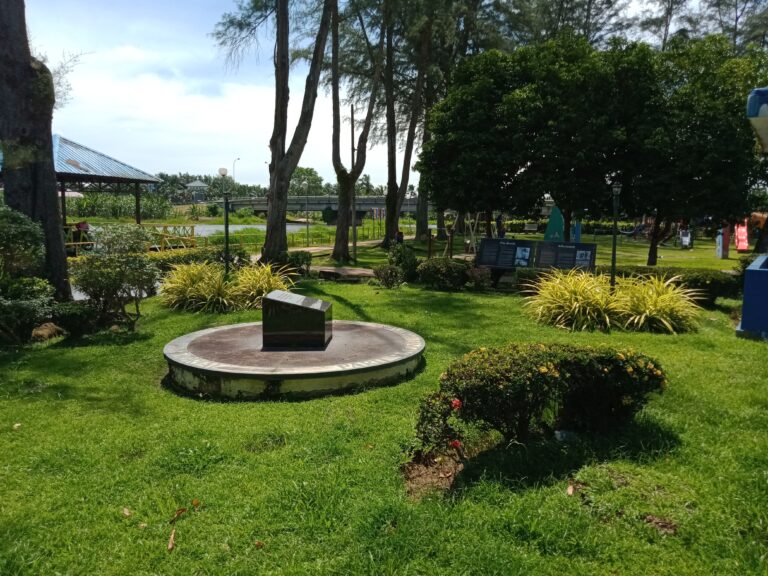
Kranji Cemetery is on the north of the island, not far from the famous causeway to Johore. Like all Commonwealth War Graves cemeteries, it is beautifully maintained with immaculate lawns and gardens.
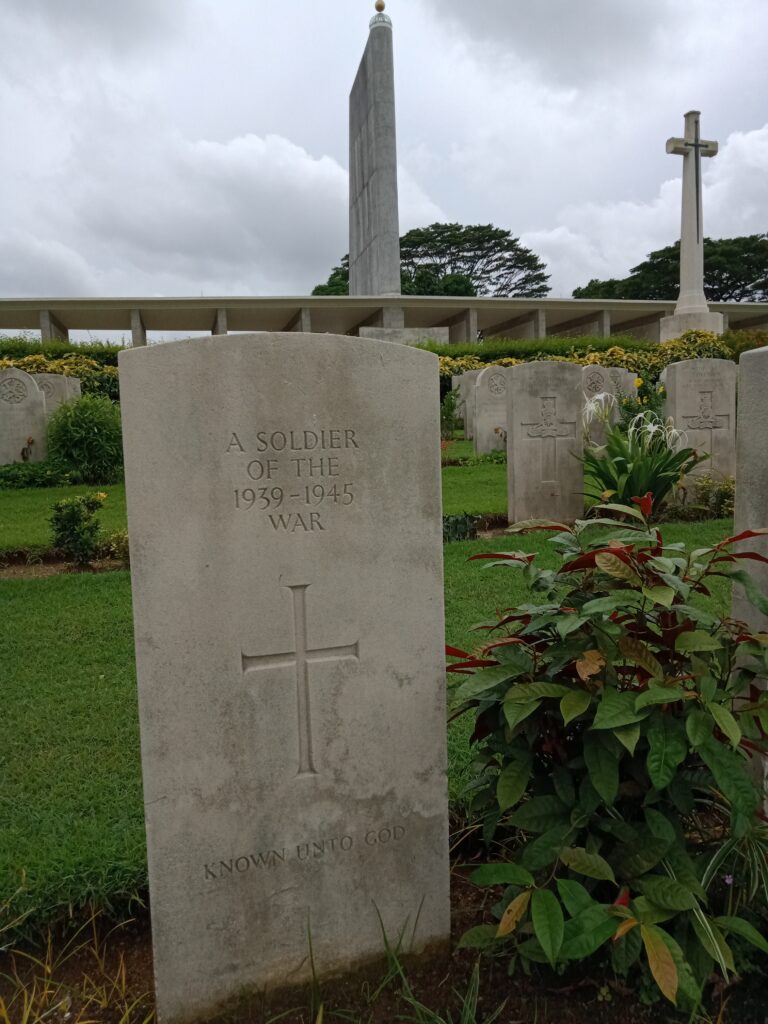
The CWGC do a magnificent job honouring those who paid the ultimate price, whether known or, as in the case of this soldier, unknown. The memorial columns in the background bear the names of those who died with no known grave and six of the eight executed escapees from Pudu Prison, Kuala Lumpur, are commemorated there. One other was a Dutch pilot and I cannot find evidence of his commemoration in any records, Australian, English or Dutch. The other escapee was buried initially at Bentong (68km northeast of Kuala Lumpur) and postwar re-interred at Taiping War Cemetery, Malaysia (266km north of KL).
Battle of Gemas
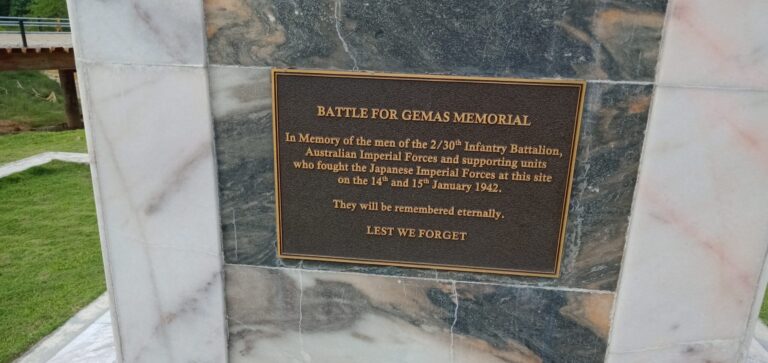
The first battle in the Malayan campaign involving the AIF took place near Gemas at the Gemencheh River and, as this plaque says, that was on January 14th and 15th 1942. Gemas is only 234km north of Johor Bahru and, in the five weeks since they landed at Alor Star and points north of Malaya, the Japanese had advanced over 600km.
The ambush at Gemas, which was Maj-Gen. Henry Gordon Bennett’s idea, was planned and executed by Lt-Col. Frederick ‘Black Jack’ Galleghan and his 2/30th Battalion. ‘Black Jack’ Galleghan was a divisive military leader: men either loved him or hated him. Those of his own battalion, generally saw the good in him. Those outside it not so much. Capt. Reg Newton was in the latter category and he and ‘Black Jack’ had some fiery clashes at Changi. Both were strong men who expressed their views forcefully and both had a powerful drive to command.
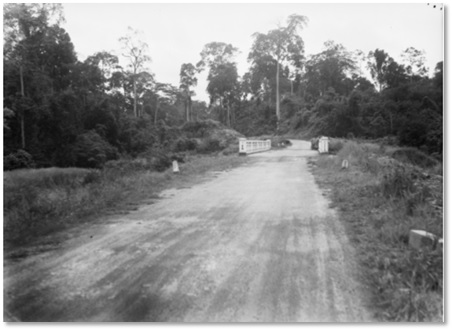
This is a contemporary photo of the Gemencheh River bridge where the ambush that began the Battle of Gemas occurred. The ambush certainly surprised the Japanese but it didn’t slow them down much.
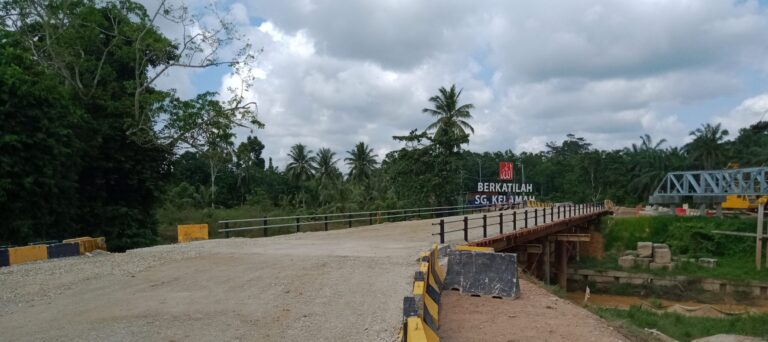
The old bridge is not there any more and its replacement is being replaced once again. That is what the passage of eighty years will do to these sites.

Reg Newton’s 2/19th Battalion went into action in the epic Battle of Muar which was fought from 16th to 22nd January 1942. The 45th Indian Brigade had tried to halt the Japanese advance at the Muar River which is 16km west of this point. When the Japanese broke through, the AIF commander, Maj-Gen. Gordon Bennett, sent a number of Australian units to stem the tide; these were elements of the 2/15th Field Regiment (an artillery unit equipped with 25-pounders), the (Victorian) 2/29th Battalion, elements of the 4th Anti-Tank Regiment and the (NSW) 2/19th Battalion. The 2/29th Bn and the 4th Anti-Tankers first encountered the Japanese near this point on the Muar-Yong Peng Rd known as the Bakri crossroads.
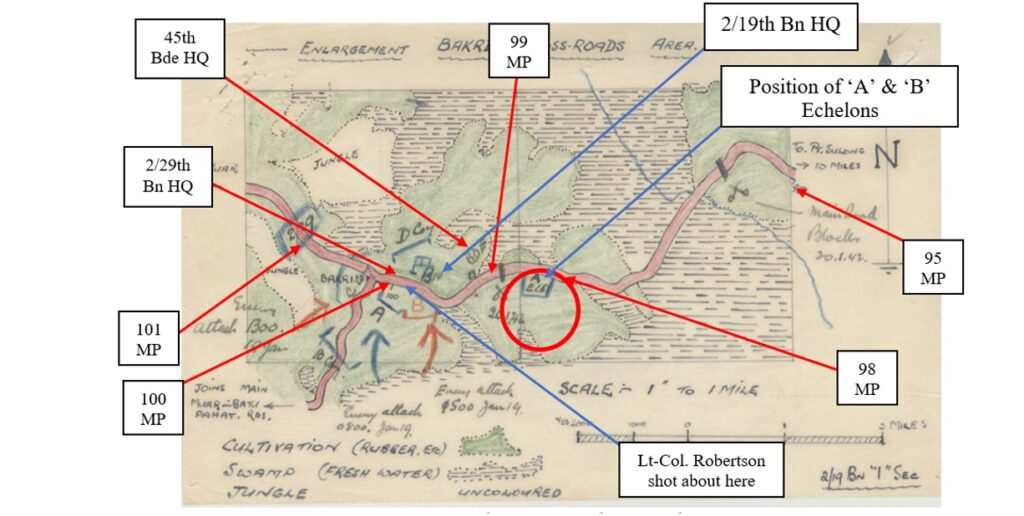
This excellent map is from the 2/19th Battalion’s War Diary and shows the area where the Australians were first engaged in the Battle of Muar. The Bakri crossroads photographed above are at the 101Mile Post and the photo directly below was taken near the 100MP. The red circle shows the location of Reg Newton’s ‘A’ and ‘B’ Echelons. Even though the map shows only the ‘A’ Echelon, both were in that same location. More is explained about that below.
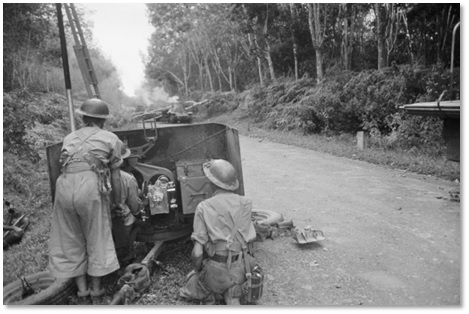
This famous AWM photo shows three 4th Anti-Tankers behind their two-pounder. Along with their mates in another gun 400m ahead of this one, they destroyed nine Type 95 Ha-go light tanks of the Gotanda Tank Coy on the morning of January 18th. Smoke can be seen rising from one of the tanks visible in the distance with trees felled behind it to block its retreat.
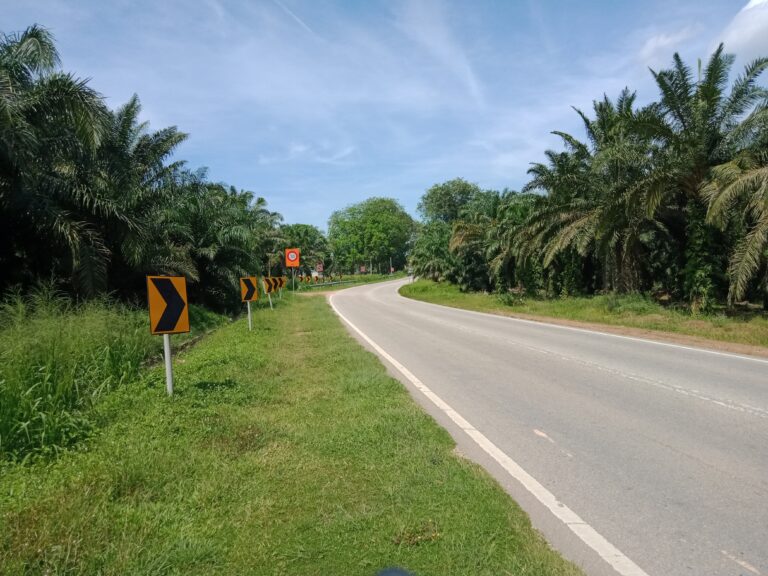
This is very close to the place where the 1942 photo was taken although the exact location was difficult to determine, even working from the fixed point of the Bakri crossroads (which is really a T-intersection). The gunners were in a low-point back from a ridge as this place is. Ahead from this photo the countryside opens out and is devoid of trees for some way. This was the area the Japanese passed through before they encountered the 2/29th and 4th A/T men seeking to halt their advance. The situation became dire very quickly and the 2/19th Battalion was sent in to reinforce the defenders at Bakri.
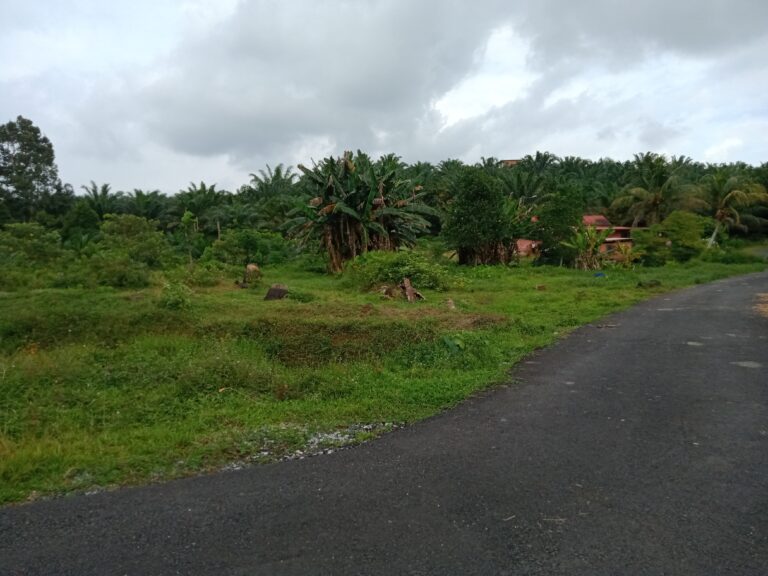
Reg Newton was CO of the 2/19th Battalion’s HQ Coy. As such he was in charge of what were called the ‘A’ and ‘B’ Echelons which were responsible for supplies of food and ammunition. The precise location he chose for his Echelon harbour is not clear from contemporary records but one entry says it was “one mile East of 45 Brigade HQ, and about 4 miles east of the Battalion at Bakri.” It was also in a low point south of the road with a hill nearby. This is a likely location. While here, his company was attacked by members of the Imperial Guard Division infiltrating around the AIF’s frontline positions.
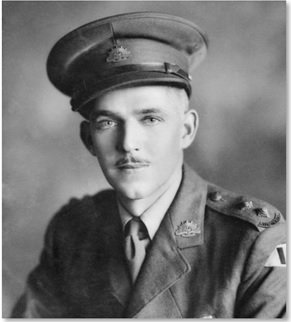
It was during the Battle of Muar that the CO of the 2/19th Battalion, Lt-Col. Charles Anderson, won the VC. Anderson was an Englishman who had fought in East Africa in WW1 and then worked as a guide to big game hunters for some years until he moved to Young, NSW, to take up farming. He was an exceptional and much-loved leader, both in battle and as a POW commander at the Burmese end of the Burma-Thailand Railway with ‘A’ Force. He won his VC not only for his outstanding leadership under fire but for single-handedly eliminating a Japanese machine-gun position, an action which seemed to be performed almost as the second thought of a man busy with more important matters.
Parit Sulong
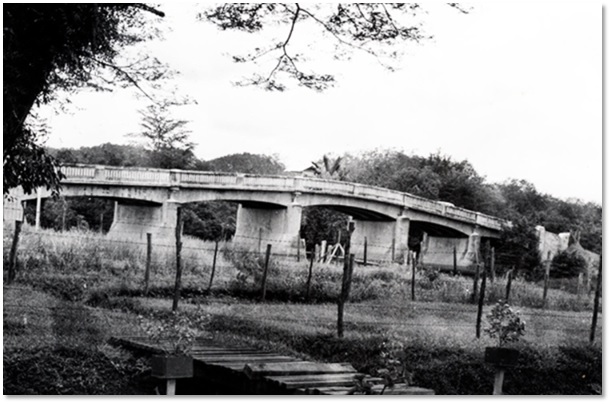
In reality, the desperate fighting around Parit Sulong was part of the Battle of Muar. However, the horrific events of Parit Sulong deserve a section of their own. This was the original bridge, of which the Japanese took possession some time on January 20th blocking the retreat of Anderson’s column (still to the west of the village) as they attempted to make their way east to Yong Peng. This is a photo of the original bridge taken from the webpage of Historic War Tours.
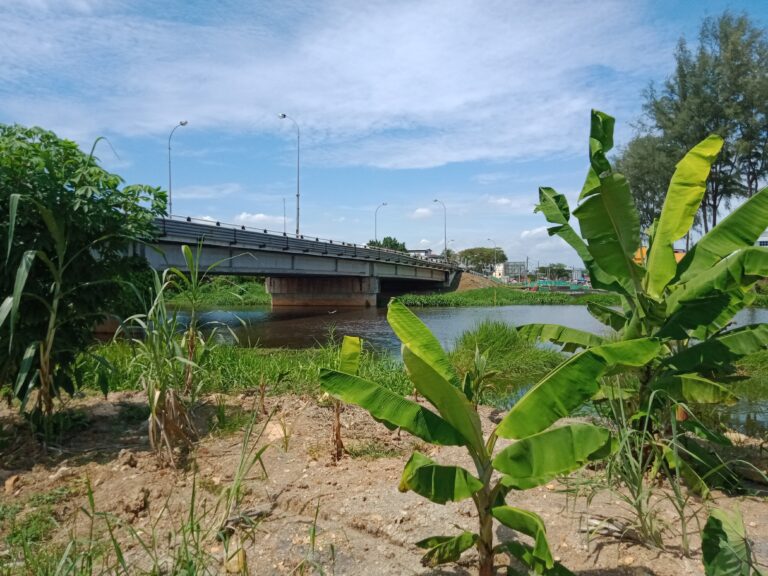
The old bridge is no longer there. This is its modern-day replacement. Terrific fighting occurred around here but the Australians were unable to dislodge the Japanese who built three roadblocks on the bridge; each was defended by interlocking arcs of machine-gun fire. Early on the morning of January 22nd, volunteers ran forward under this withering fire to hack at the obstacle with axes. They got through two but could not overcome the third. This was Lt-Col. Anderson’s last roll of the dice and so, at 0900hrs on January 22nd, he gave the order for survivors to break into small parties and make their way cross-country to Yong Peng, a distance of less than 30km by road. Many made it but many did not and were either captured or killed or captured then killed.
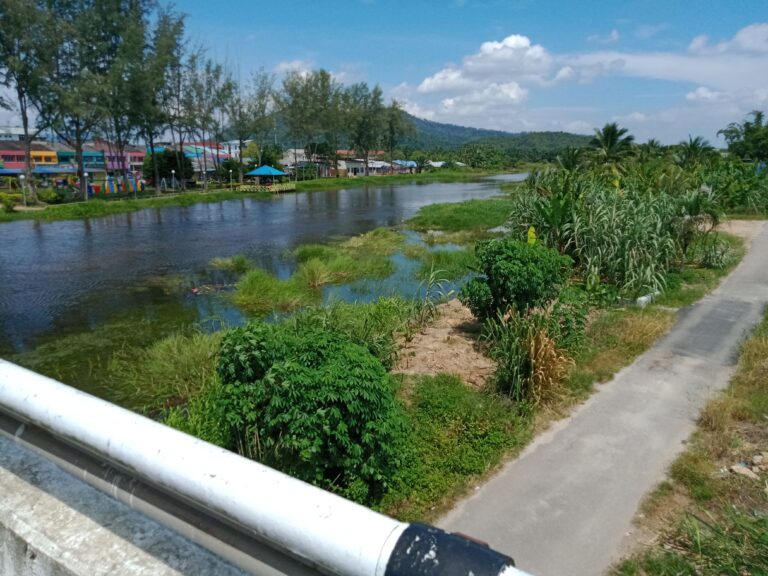
This is a view of the village of Parit Sulong as it is now from the bridge. The colourful town sign visible in the middle left of the photo provides a more friendly welcome than the AIF received in 1942.
There used to be a plaque on the bridge erected by members of the 2/19th Battalion Association. That went when the old bridge was removed. This is the current cairn commemorating the battle. It stands in a pleasant recreation reserve. The plaque honours all who fought and died “at Muar, Bakri and Parit Sulong, January 1942.”
The story of Parit Sulong cannot be told without reference to Lt Ben Hackney of the 2/29th Battalion. He was one of two men (Pte Reg Wharton was the other) who survived the massacre of 110 wounded Australians and 35 wounded Indians that took place there. (At least two other men—Lt Hugh Tibbitts and Sgt Ron Croft—survived the massacre but not the war. Tibbits disappeared into the jungle and was never seen again. Croft was later killed fighting with Chinese guerillas in the area.) After ten days he described as sheer hell, Wharton managed to make it back to Allied lines but by then his wounds were fly-blown with maggots an inch long. Remarkably, he and a mate subsequently escaped from Singapore but were recaptured in Malaya and sent to Pudu when their story about being stragglers left behind by retreating forces was believed. Both Hackney and Wharton came to be interned at Pudu Prison where Reg Newton was the senior Australian officer. Both had to be highly secretive about their experience because their captors were intent on leaving alive not even a single witness to their abominable conduct. This was difficult because Hackney had a broken leg and eleven bayonet wounds; in addition to his other wounds, Wharton had a tell-tale scar on his neck. Both had to conceal the extent of their injuries and speak of their experiences only in veiled terms even to their closest mates.
As mentioned, the wounded had to be left behind by Lt-Col. Anderson and his column who went bush to avoid capture. Anderson’s hope was that the triumphant invaders would give proper medical care to his men. That hope proved to be forlorn. This is the restored Public Works Department Building where historian Lynette Silver believes most of the 145 wounded men were crammed prior to their execution. Before being herded into a small section of this building, passing Japanese troops took delight in tormenting the wounded and kicking or rifle-butting their untreated injuries. The commander of the Imperial Guards (Konoye) Division, Lt-Gen. Takuma Nishimura, stopped at the bridge and looked into the building where the heaving mass of broken men was crammed, many calling desperately for water. Nakamura turned away then casually gave the order to kill them all. His 2IC added the helpful instruction that the bodies were to be burned afterwards. From Hackney’s postwar testimony, it is clear not all were killed in the initial machine-gun blasts before being doused in petrol and set alight in the midnight hours of January 22nd. The scene that must have been played out is just too horrific to describe.
Kuala Lumpur
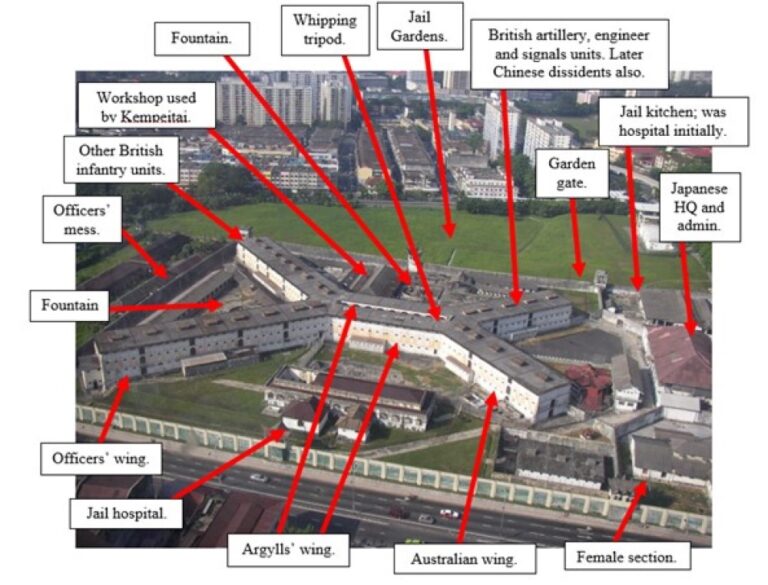
This is an aerial view of Pudu Prison, Kuala Lumpur, taken from Wikipedia with details from a map drawn by Pte Charles Edwards added. Reg Newton and about 175 other Australians were interned there; most were survivors of the Battle of Muar. The total number of POWs grew to about 1,100 and, for the first months, all were crammed into the former female section visible in the bottom right of the picture. When Pudu was evacuated in October 1942, some of the British were sent to the Railway while the Australians and most of the remaining Brits were sent to Singapore.
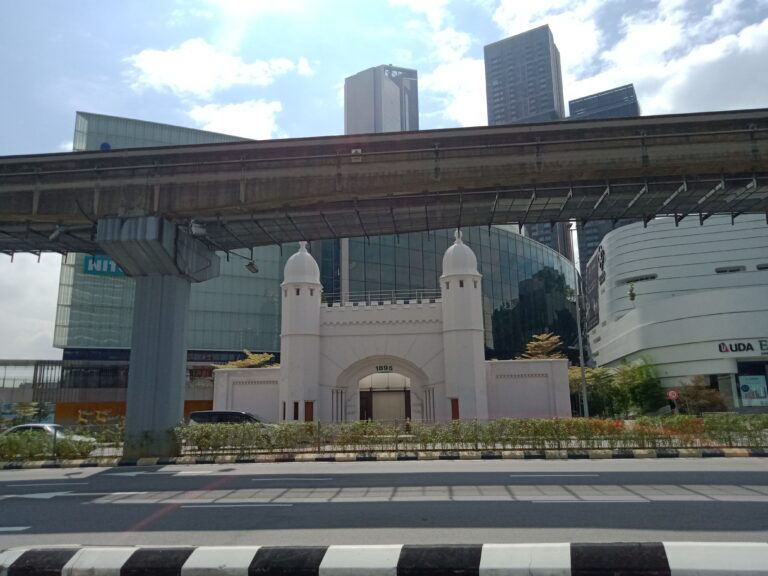
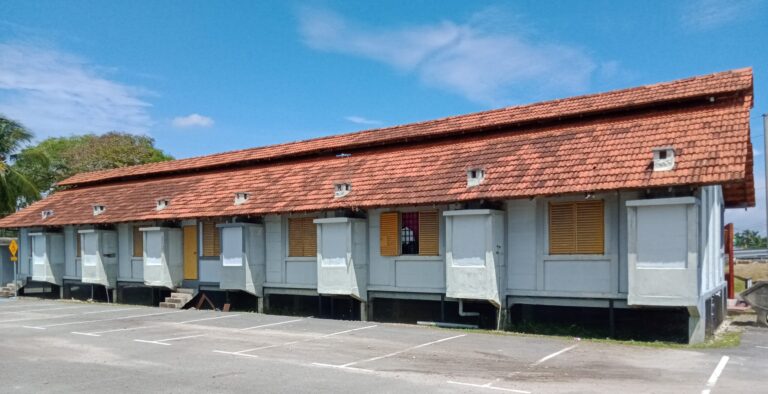
The front gates are all that remain of the old prison now. The former grounds have been used to construct high-rise commercial and residential developments. In the seven months he was housed at Pudu, Reg Newton learnt some of the skills required to successfully walk the tight-rope required of those proud Anglos who were now slaves to Nipponese masters. While he tried valiantly to persuade ‘Black Jack’ Galleghan in Singapore of these nuances, ‘Black Jack’ was deaf to advice contrary to his pre-determined course—whatever that may have been from time to time. This intransigence was to come at great cost to members of the ill-fated ‘F’ and ‘H’ Forces when they were dispatched to the Railway. Whatever one might say about those events and however much one might hold the Japanese culpable, one cannot reasonably say the AIF high command at Changi were not given fair warning, warning they chose to ignore.

Cheras Rd Cemetery is 6.6km from Pudu Prison. The escape from Pudu on the night of 13th/14th August 1942 by five Britons, one Dutchman and two Australians is described in more detail in the article on this website. All were recaptured and tortured. Seven of the eight were returned to Pudu and taken from there on the morning of September 16th and driven here to Cheras Rd cemetery where they were made to dig their own graves and shot. These seven have no known grave and are commemorated on the memorial wall at Kranji cemetery, Singapore. One of the escapees, Capt. Dick Nugent, was wounded when recaptured but taken from his hospital bed on about September 13th and executed. His grave is in the Taiping War Cemetery, about 265km north of Kuala Lumpur.
The Railway
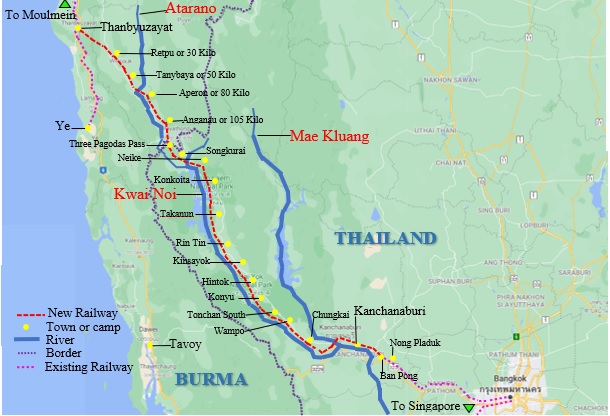
This map of the Railway might help make sense of where the photos that follow fit in. The furthest north Reg Newton went was around Hintok-Konyu which is the location of the infamous Hellfire Pass. One of the key camps in which his ‘U’ Battalion was based was Tonchan South. The photos in this section move in a northerly direction from Kanchanaburi as far north as Hintok. Remember, from south to north the Railway covered 415km. From Banpong to Hintok was 156km.
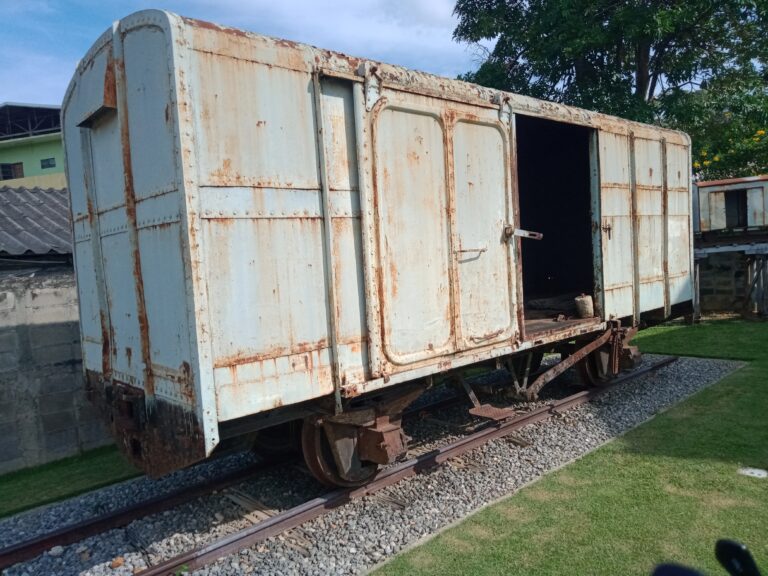
Prisoners were sent to Banpong in what were referred to as steel rice trucks such as this. About 35 men were crowded into a single wagon with around 550 making a train-load. Each wagon was assigned a guard who took up the prime position in the doorway. The POWs had to work around him. In the day these trucks were hot-boxes and by night chilly bins.
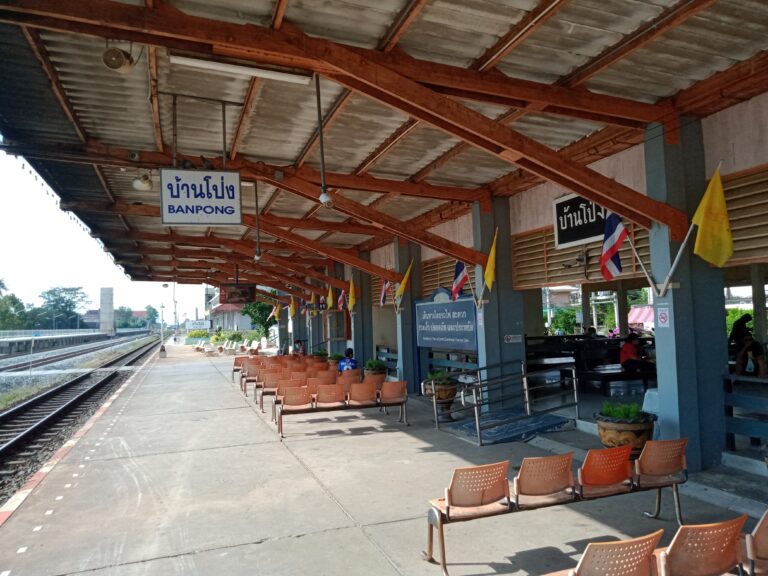
Banpong was where the Railway construction started although Rod Beattie of the TBRC says the first section between Nong Pladuk and Kanchanaburi was built by Thais recruited by the Japanese. Progress was too slow for the Japanese so they brought in workers more firmly under their own control.
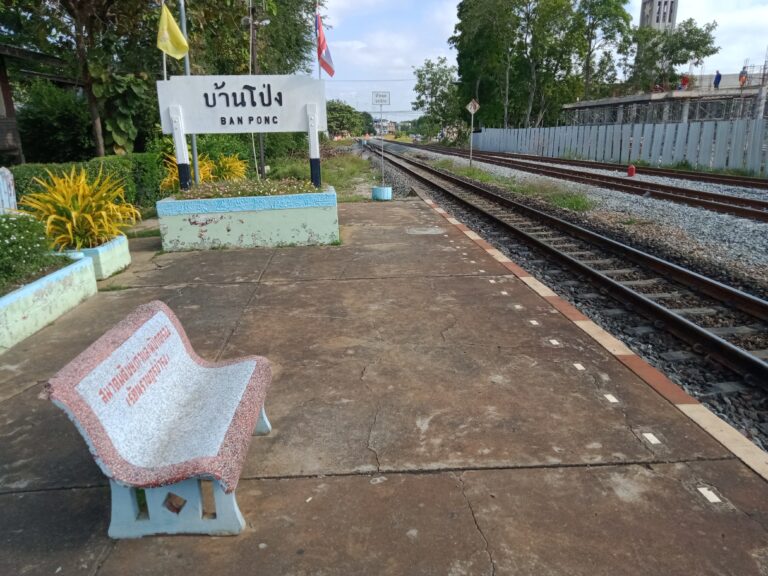
Banpong was certainly the first place POWs and romusha shipped in to work from the Thai end landed. They staged here and then moved to Kanchanaburi, 50km further north either walking or riding depending on the liver of the Japanese in charge. At the same time as men were working from the Thai end of the Line, others were working from the Burmese end, starting at Thanbyuzayat and coming south. The plan was that the two ends would meet somewhere around the Thai-Burmese border, near Three Pagodas Pass.
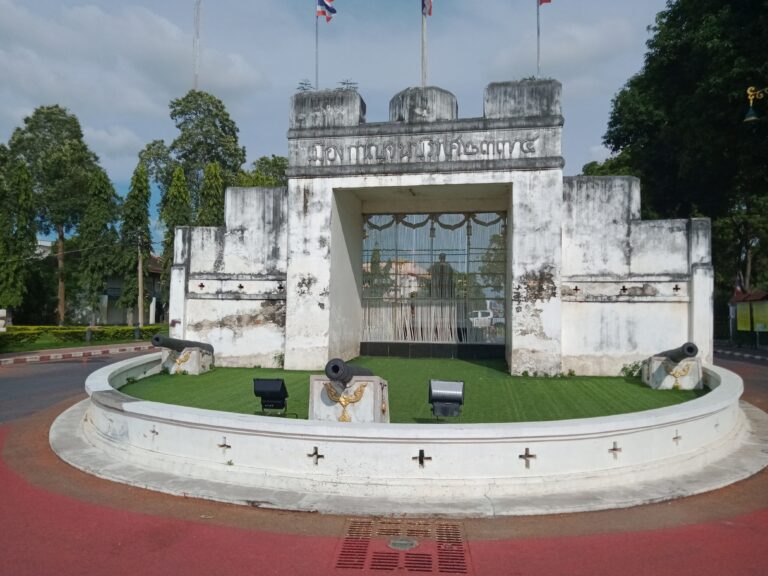
These are the old city gates of Kanchanaburi. The walls around the city were built to keep out invaders from Burma.
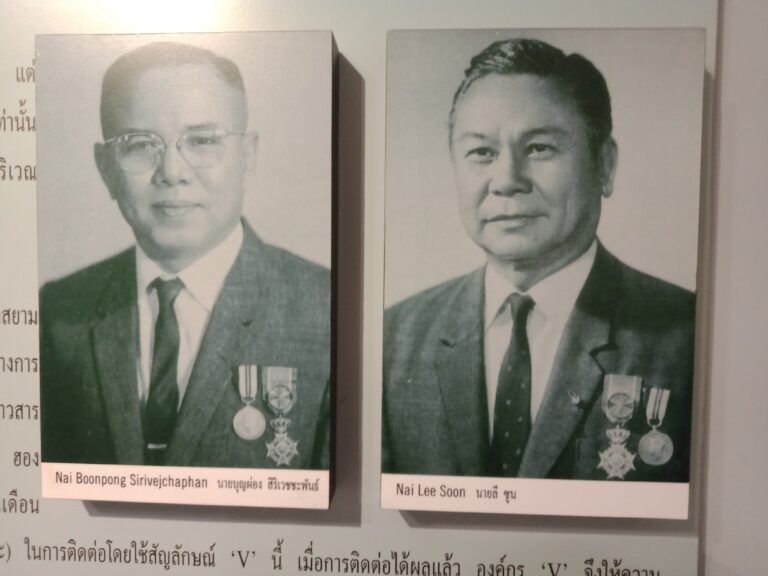
This is a photo from the TBRC of the remarkable Chinese-Thai businessman, Nai Boonpong Sirivejjabhandu (left), known to the POWs as Boon Pong. His brother-in-law, Nai Lee Soon, is on the right. With the assistance of the underground ‘V’ organisation, Boon Pong took barges with supplies up-river to the POW camps fulfilling his contracts with the Japanese. He also smuggled extra food and life-saving medicines. His name is mentioned reverentially in many POW memoirs and there were a lot of former prisoners who felt that they and their mates owed their lives to him and the good work he carried out on their behalf. Reg Newton and Boon Pong worked closely together and Newton paid for supplies by writing personal cheques—cheques which the Australian Army later chose not to reimburse and, when Newton complained, they court martialled him. Isn’t the power of officialdom a beautiful thing?
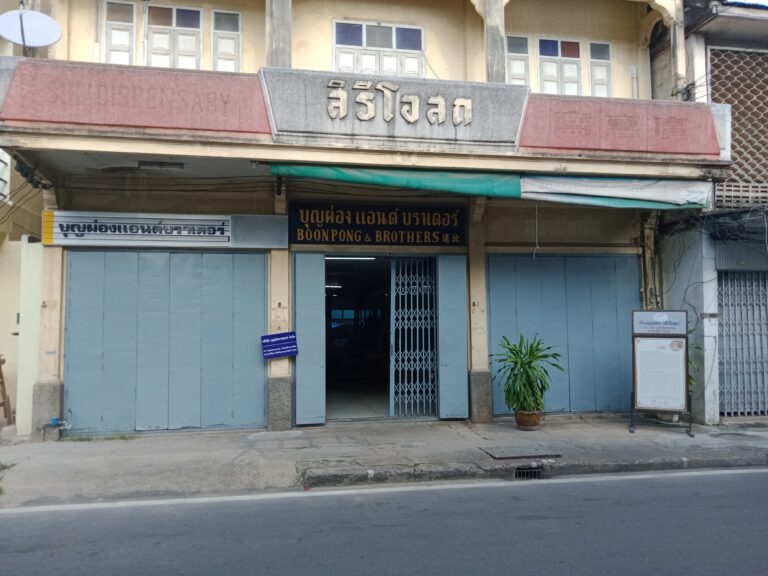
Boon Pong died in 1982 but the shop he ran in Kanchanaburi is still there, only a short walk from the city gates, near the bank of the river for ease of access to the barges used for trade.
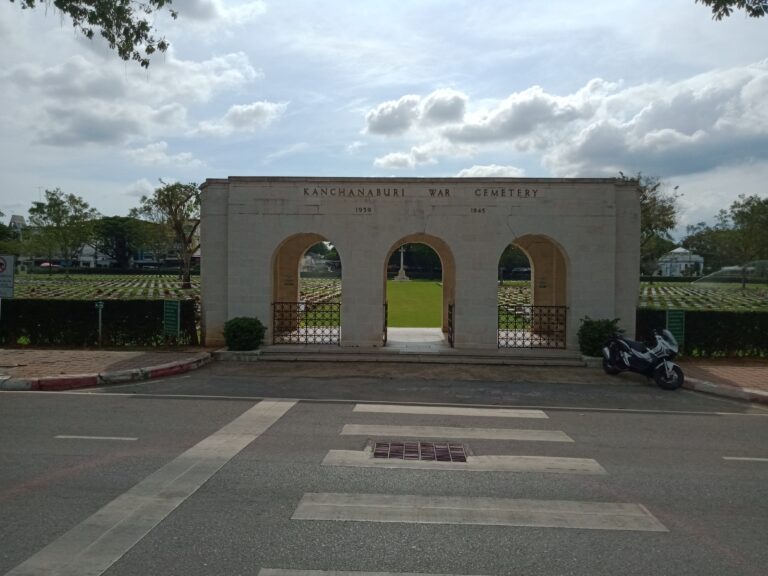
The Kanchanaburi War Cemetery is in the centre of town. In 1945 this was an empty field next to a Chinese cemetery and deemed suitable by the War Graves Commission for the purpose of concentrating the remains of those buried along the Railway.
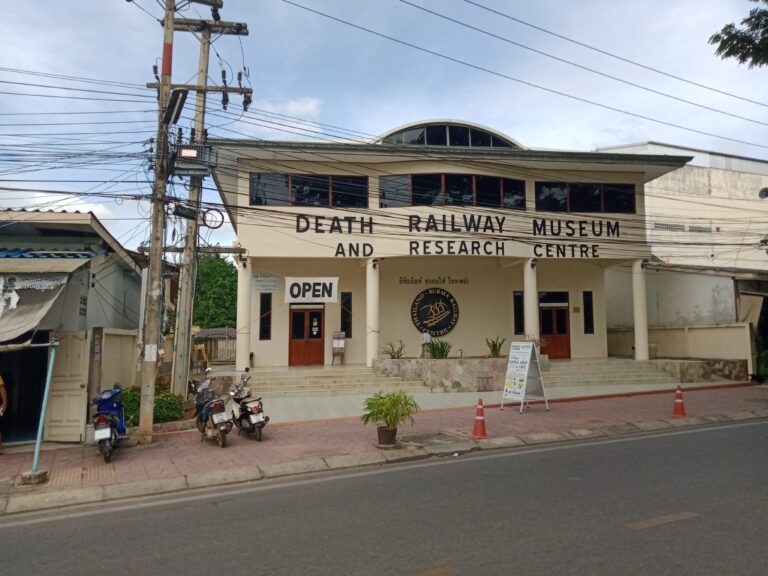
This photo is a reverse angle of the one above so that the TBRC is opposite the Kanchanaburi War Cemetery which its founder, Rod Beattie, managed for about 20 years.
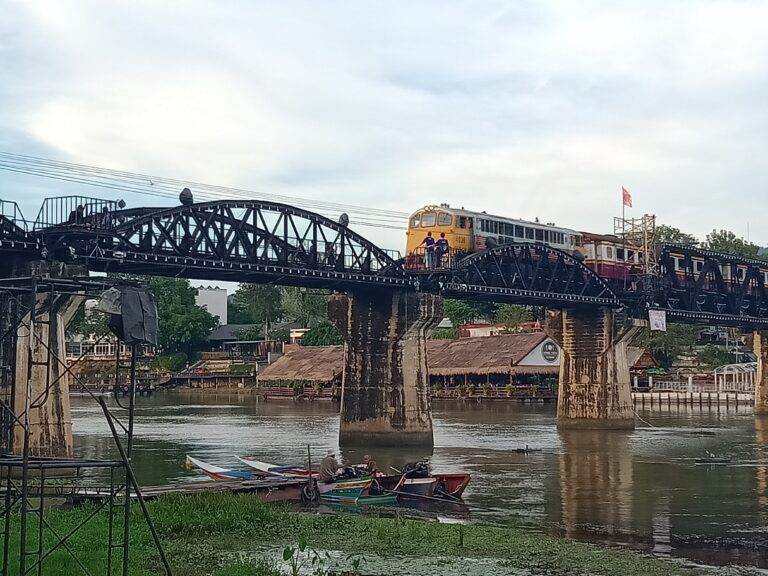
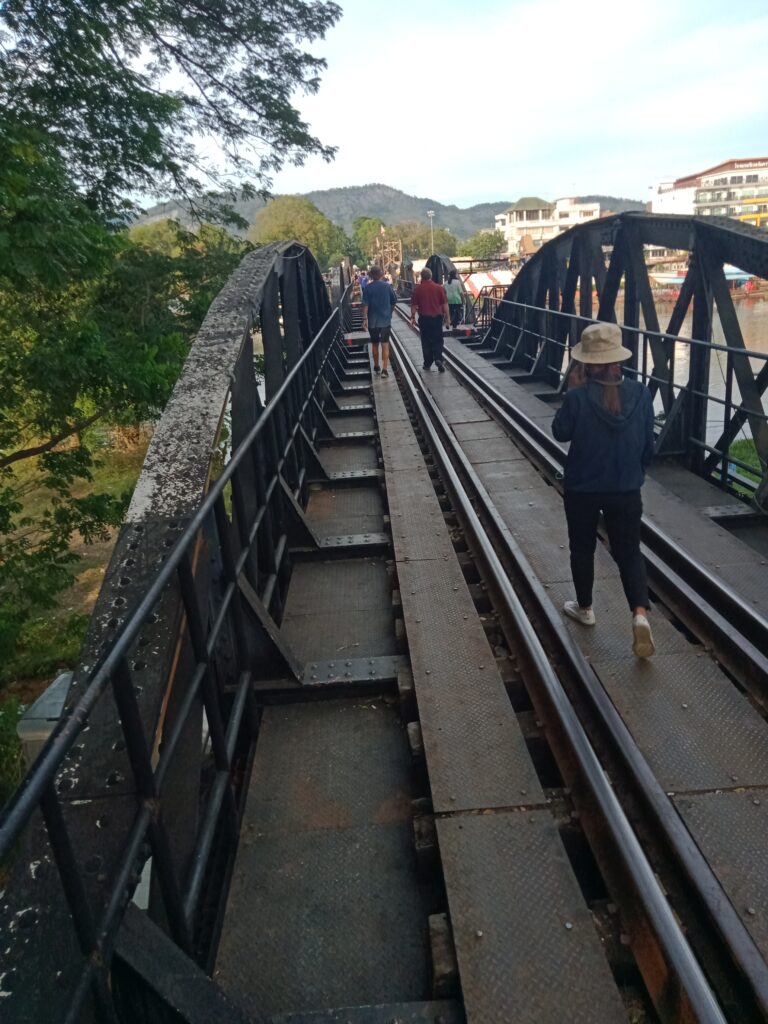
The famous bridge is a major attraction. Originally it had arched steel sections all the way across. The two rectangular sections in the middle were later replacements after Allied bombing. One of the rectangular sections is visible on the right of the photo.
We arrived in Kanchanaburi on a long weekend when they were having a Railway festival so there were plenty of people and a lot going on. It attracts many local visitors as well as tourists from overseas . The energy of the Thai people and their passion for street-side trade which was noted by POWs when they were in the area is still very much in evidence today.
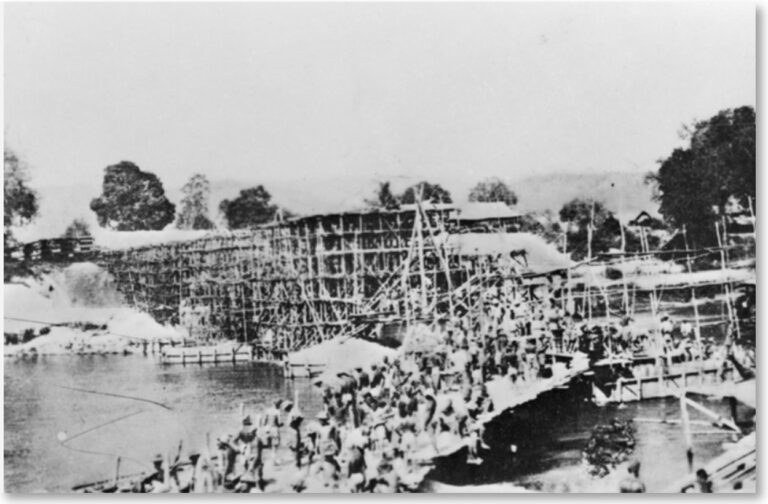
This AWM photo shows the mass of impressed labour employed in the construction of the wooden bridge built as a temporary measure until the steel and concrete bridge was finished.
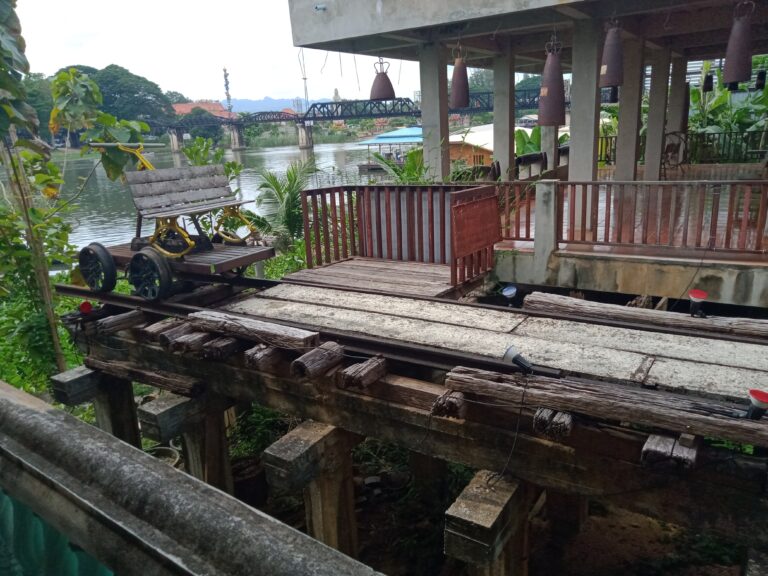
Not much is now left of the wooden bridge which was pulled down on completion of the steel one. It was rebuilt in the last year of the war because it was easier to repair after the steel bridge was cut by Allied bombing. The steel bridge is visible beyond with the different-shaped sections clearly shown.
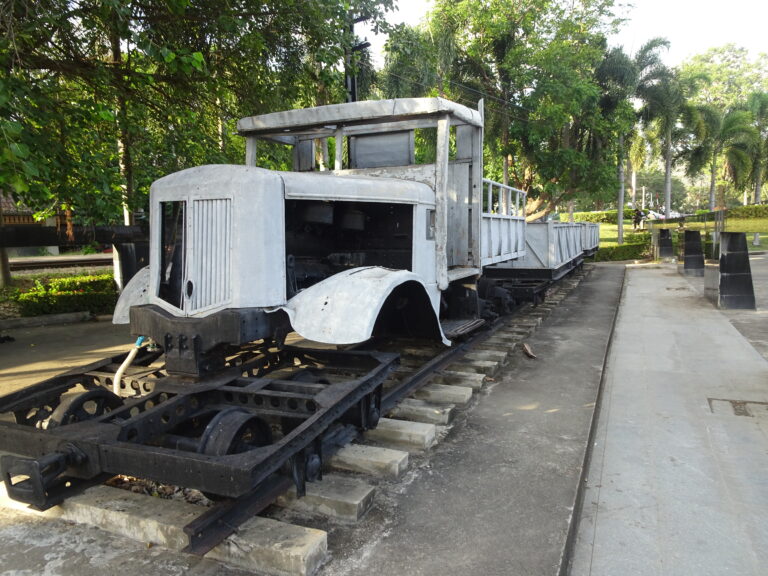
The Japanese used a variety of locomotives as well as diesel trucks specially converted for the Railway. While this type of thing is common enough nowadays amongst railroad maintenance crews, the arrangement proved fascinating to POWs and attracted quite a lot of comment in memoirs. Ray Parkin drew a very detailed sketch of one which Reg Newton reprinted in ‘The Grim Glory of the 2/19th Battalion.’
This is perhaps a bit of a nothing shot. It was taken at Wampo station but I liked the direction indicators to the neighbouring stations. Wampo was a notoriously tough work area for the POWs. Nam Tok is where what’s left of the still-working railway ends.
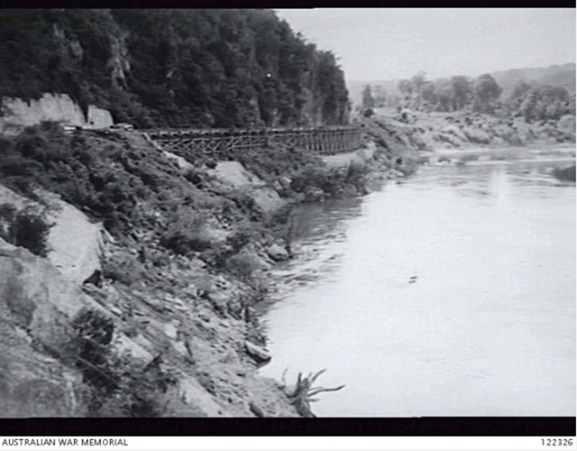
This AWM photo of the Wampo Viaduct was taken on 20 October 1945. It provides the basis for an interesting ‘then’ and ‘now’ comparison using the photo that follows.
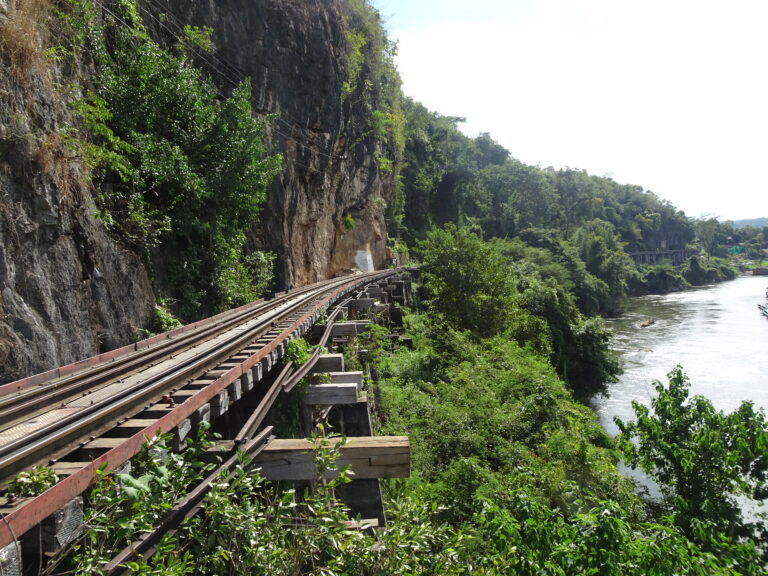
The train from Kanchanaburi to Nam Tok still runs over the Wampo viaduct.

A view from below gives a good idea of the construction of the trestles which Rod Beattie of the TBRC says were modelled on a pattern outlined in a book written for US civil engineers.
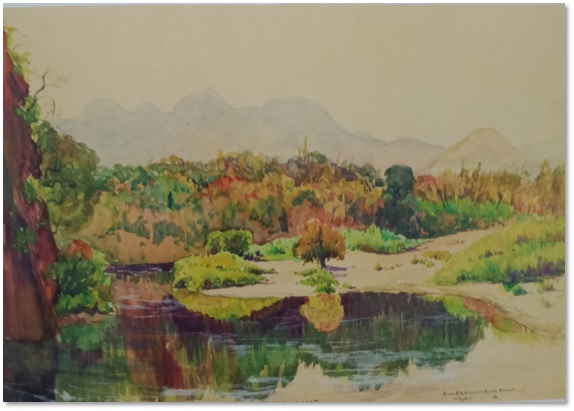
Tarsau is between Wampo and Tampie and became the site of a large POW hospital. Ray Parkin of Dunlop Force and later Newton Force painted this watercolour of the Elephant Hills opposite the camp at Tarsau.
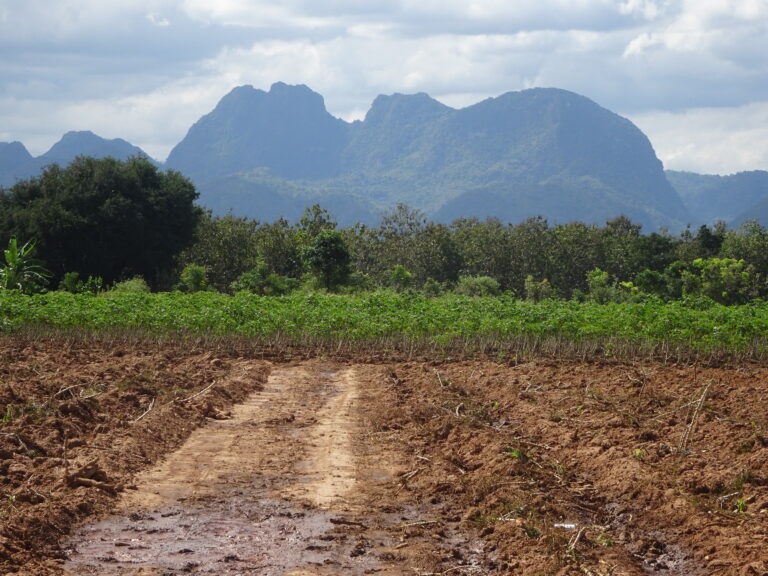
The hills are described by locals now as looking more like a pregant woman lying down. They make a good point.
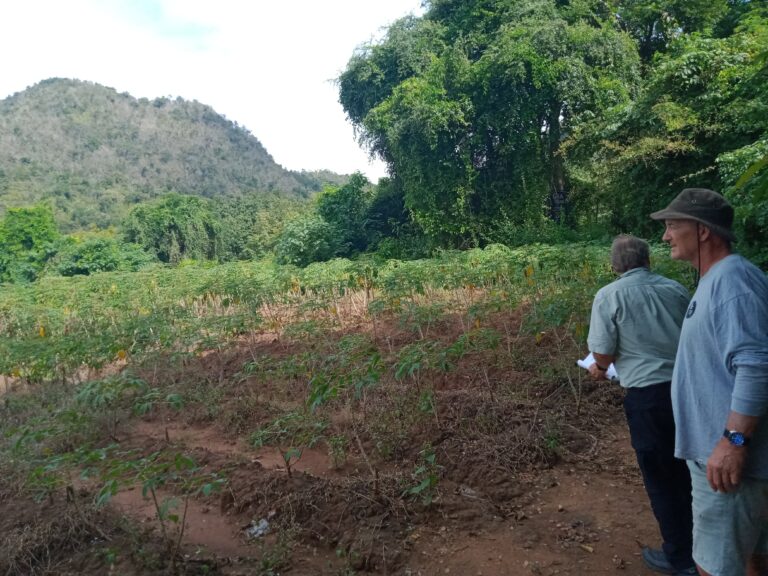
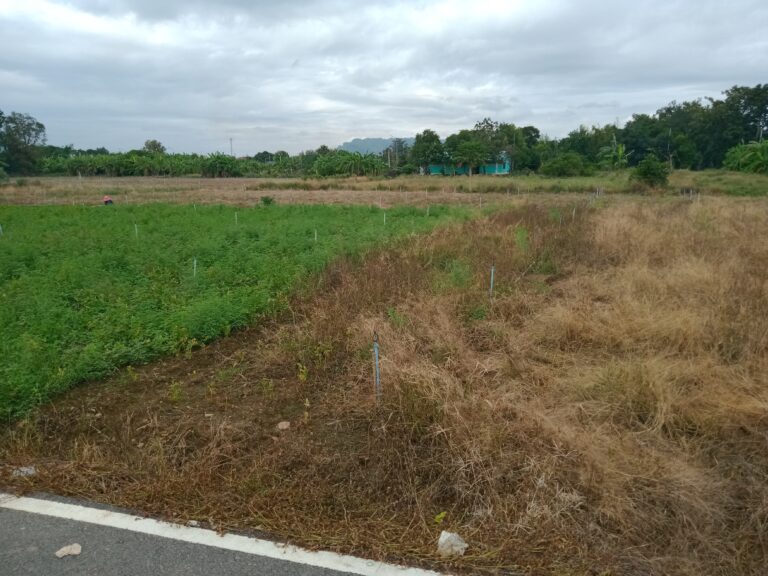
This is the site of the Australian camp at Tonchan South in a present-day farmer’s tapioca field. The camp complex also housed members of the Singapore Volunteers and Tamils.
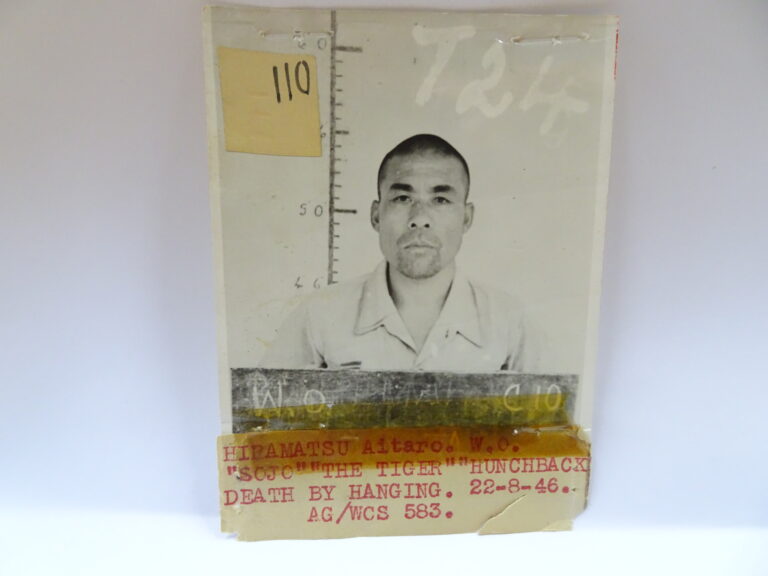
The man in charge at Tonchan South was WO Aitaro Hiramatsu, aka ‘the Tiger’. When Newton arrived at Tonchan, he already knew of ‘the Tiger’s’ reputation as a Pommie-killer. Newton and Hiramatsu were to form a complex relationship, such as one might expect of two alpha males except in this case one held all the power while the other was wily enough to duck and weave and know which buttons to push to get the best out of the other. Hiramatsu was hanged in Changi at the end of the war, mainly for his ill-treatment of British POWs—ill-treatment which was at least partly the result of weak leadership from a lieutenant-colonel of the Singapore Volunteers. Many of the ‘U’ Battalion men spoke of Hiramatsu with grudging respect. There were occasions when he intervened to protect them from the savagery of engineers. ‘The Tiger’ accompanied Newton Force when they sailed to Japan and the bruhaha on the docks at Moji when he learnt that, contrary to previous promises, he would have to return immediately to the Railway—without home leave so that he never again saw his family—was both exceptional and poignant.
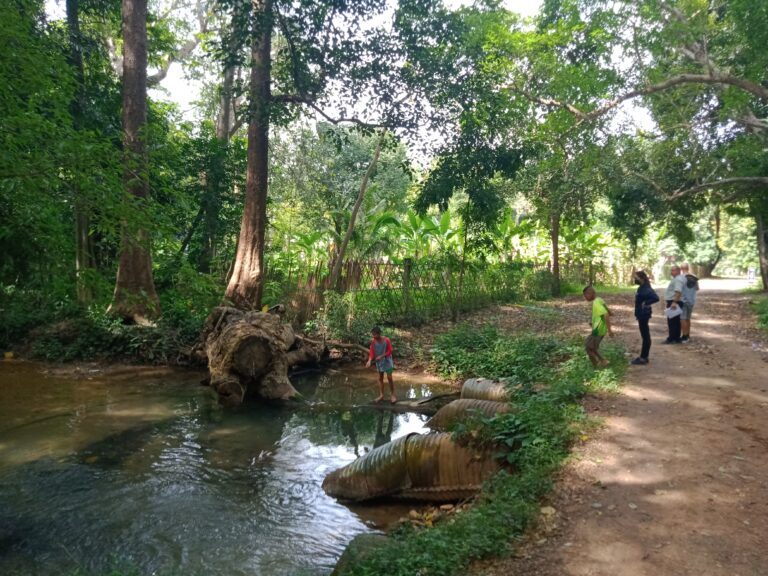
The pond in which these boys are fishing was right next to the site of the guardhouse occupied by ‘the Tiger’ at Tonchan South.
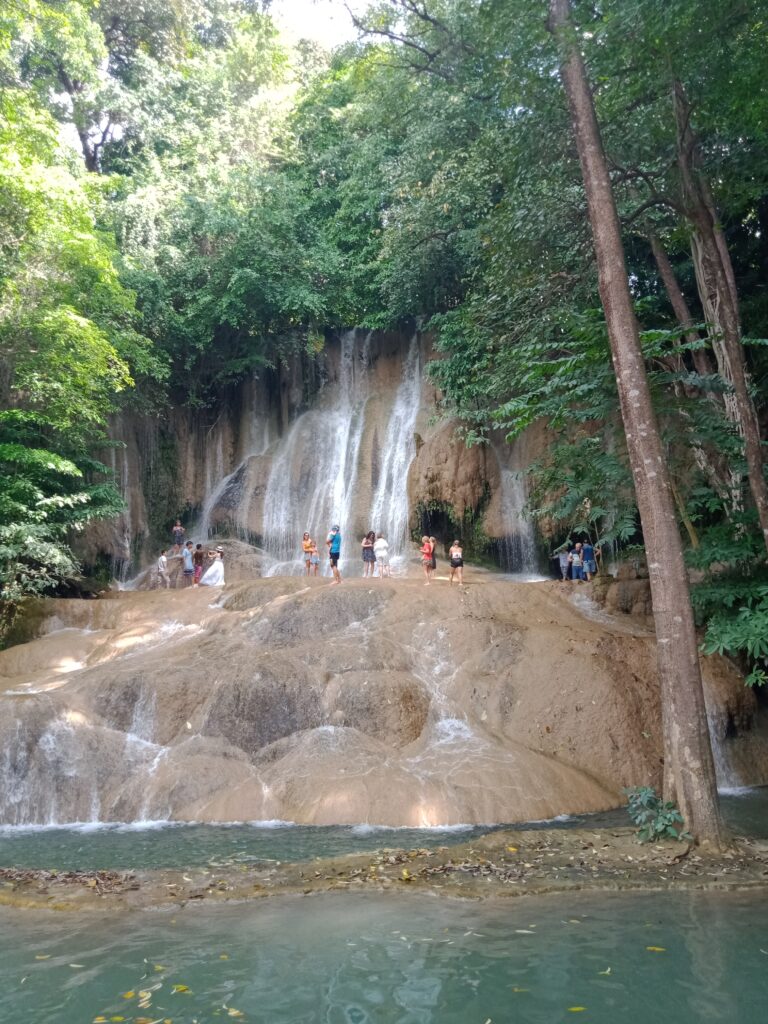
The popular Nam Tok waterfall in Sai Yok National Park is just a short walk down the hill from the Tonchan South camp site. This is the end of the modern railway and 85km from Kanchanaburi.
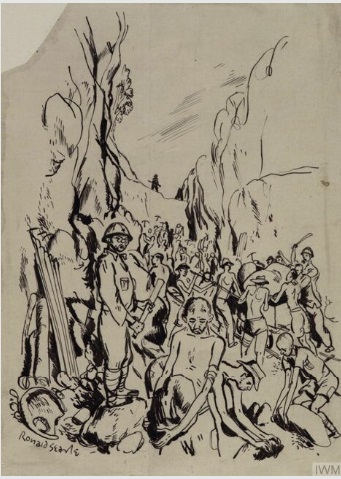
This IWM image is a sketch by British POW, Ronald Searle, depicting the Konyu Cutting or Hellfire Pass as it was in June 1943. So that was then. And this is now.
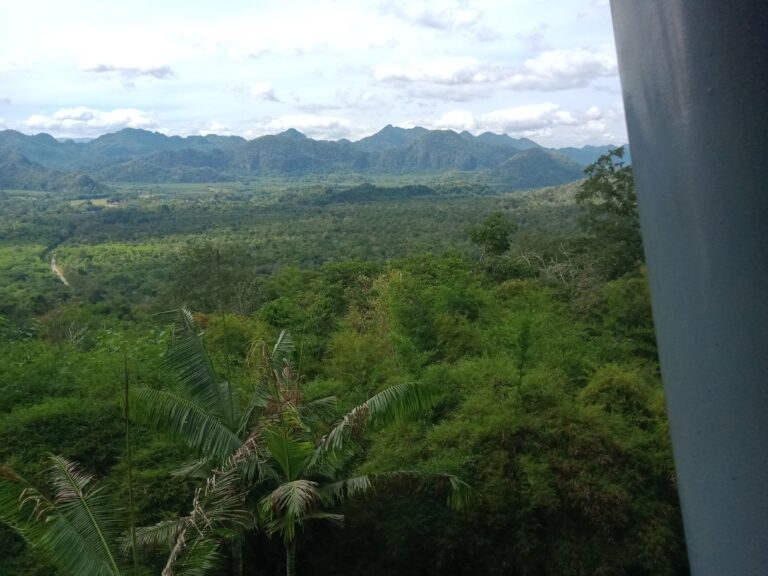
These are the hills visible from the Remembrance Centre at the start of the Konyu Cutting which became better known as Hellfire Pass.
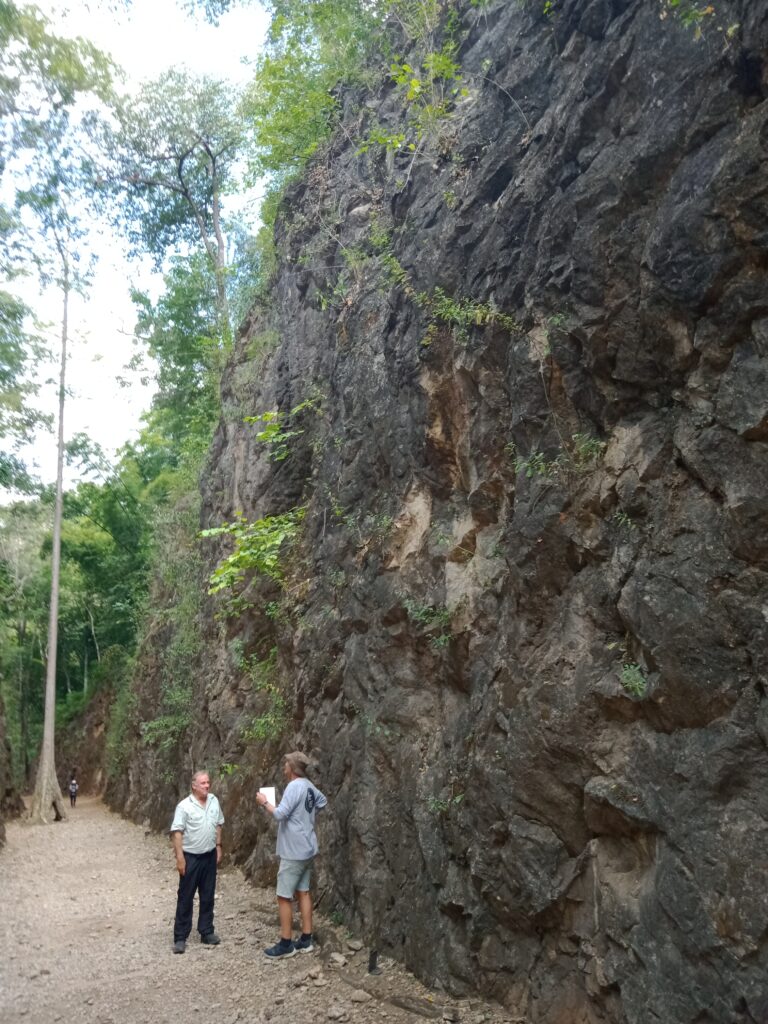
This view gives a good impression of the amount of rock removed to excavate the cutting at Hellfire Pass. Men worked 24 hours a day on this project and more and more were shipped in as progress fell behind the uncompromising schedule set during the speedo period which coincided with the monsoon season and associated outbreaks of cholera. The intensity of the work under these conditions was simply insane.
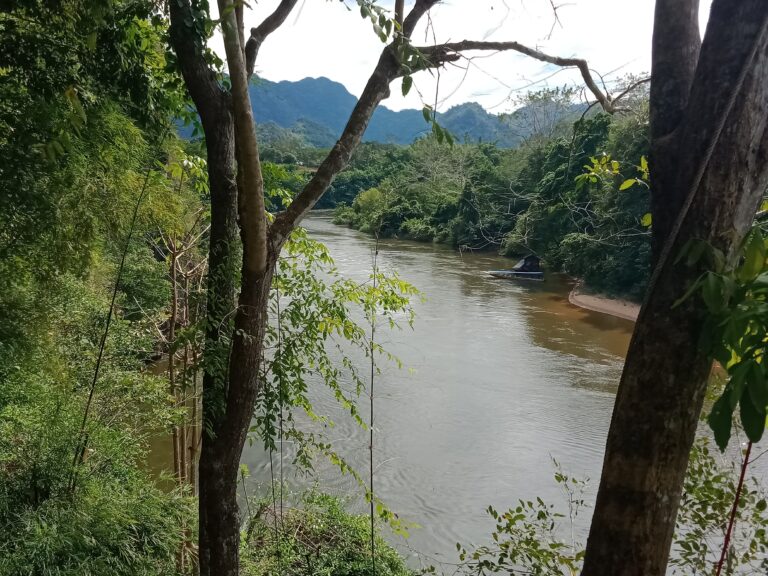
This is the location of the Hintok River camp. From this camp workers went south to the Konyu cutting and to another cutting in a northerly direction. There were at least two camps at Hintok but three names: Hintok River, Hintok Road and Hintok Mountain. Hintok Road and Mountain were same place. ‘Weary’ Dunlop and his men from Java were at Hintok Mountain. In this area the railroad appears to have gone from cutting to viaduct over and over, each of which required enormous effort to construct with the primitive tools employed.
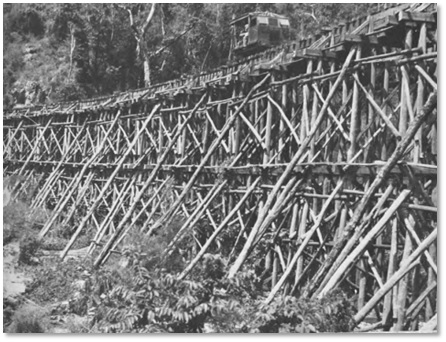
The extraordinary three-tiered ‘Pack of Cards’ bridge at Hintok got its name because of the number of times it fell down. One can see the improvised construction method with the green timber felled from the area around. When pieces were cut short, packs and shims were hammered in to make do. Whenever required to travel on trains, POWs became extremely nervous since derailments were frequent.
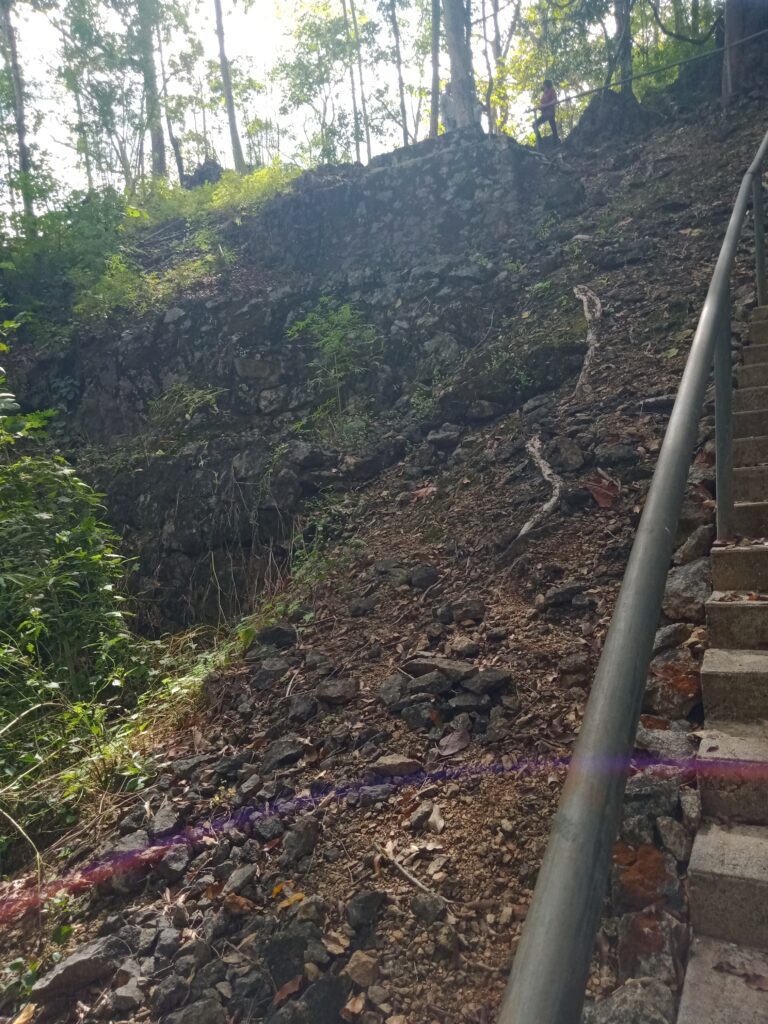
Beyond the crest in this photo is Hintok cutting. At the bottom of this steep descent was the abutment for the ‘Pack of Cards’ Bridge. The three figures visible at the top give an idea of the scale. This was as far north as Reg Newton and his men worked.
After completion of the Railway, Newton and ‘U’ Battalion were sent to Tamuang camp between Kanchanaburi and Wampo. At Tamuang, Newton was put in charge of 2,200 men deemed fit enough to travel to Japan. There they were put to work in such places as shipyards, foundries and coal mines to replace the enormous volume of manpower absorbed by Imperial Japan’s armed forces. This photo shows the location of the Tamuang camp.
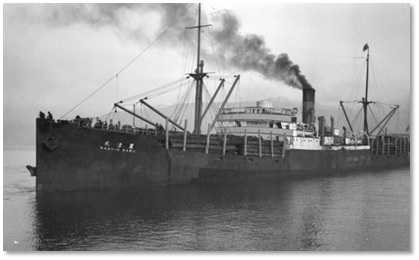
In June 1944 Newton Force was sent to Singapore and on July 1st loaded onto two hell-ships one of which was formally called the Rashin Maru but dubbed by the POWs the Byoki Maru or the sick ship. This is a photo of the Rashin Maru taken from the 2/4th MG Bn Assoc. website. It shows the ship in her more respectable days before it was sunk, salvaged and patched together to carry cargo both commercial and human. Normally, it would take a week to ten days to sail from Singapore to Japan. This dilapidated ship took 70 and the 1,100 men crowded on board were not allowed off that whole time. It was a nightmare voyage with torpedo attacks, sinkings and a typhoon. It was also the overture to Newton’s last year in captivity spent in the Ohama 9-B camp, roughly equi-distant between Hiroshima and Nagasaki. There were many epic voyages in WW2 but this must surely rank amongst the more remarkable. However, as far as journeys are concerned, this is where this photo journey to the Railway ends.